


DJI Osmo 360 Beginners Guide & Setup Tutorial
Welcome to the world of endless creativity with the DJI Osmo 360—a standout 360° camera in 2025. Whether you’re aiming to create breathtaking VR content, enhance your travel vlogs, or capture family moments with cinematic clarity, this guide will help you navigate through the setup and usage of your Osmo 360 efficiently. Even Tony Stark needed a guide (rumor has it), so let’s dive into everything you need to know!
Why Osmo 360? A Revolution in Your Pocket
Not all cameras can make the world feel like your personal movie set, but the Osmo 360 breaks the mold. Here’s why it’s creating a buzz among content creators, drone enthusiasts, and seasoned GoPro users:
- Native 8K 360° Video: Four times sharper than 4K, ensuring your videos look stunning on all screens, including VR.
- 120MP 360° Photo Mode: Capture incredible panoramas, whether it’s a mountain peak, a cityscape, or your next legendary party.
- Dual 1-inch HDR Sensors: Experience excellent low-light performance and a broad dynamic range, perfect for shooting both indoors and outdoors.
- Up to 100 Minutes of 8K Recording: Record entire events without worrying about running out of battery.
- Magnetic Quick-Release Ecosystem: Easily switch mounts and accessories—goodbye to fiddly setups.
- OsmoAudio™ Direct Mic Connection: Connect your DJI Mic transmitters for crystal-clear audio—ideal for interviews and vlogging.
- Smart Battery: Offers up to 190 minutes in 6K mode, designed to perform in both freezing and scorching climates.
First Impressions: What’s in the Box?
Upon unboxing the Osmo 360 “Standard Combo” package, you’ll find:
- Osmo 360 camera
- Protective lens covers
- Magnetic quick-release mount/adaptor
- USB-C charging/data cable
- A printed quick-start guide
Pro tip: Keep an eye out for extra goodies like stickers or microfiber cloths—it would be a shame to accidentally discard these little delights.
Step-By-Step: Your Osmo 360 Setup
1. Charging and Formatting
Start by charging the Osmo 360 with the provided USB-C cable—full charge takes just over an hour. If you have a microSD card (a wise choice for 8K content), insert it and follow these steps:
- Navigate to System Settings > Storage.
- Format the card to ensure reliable video performance in 8K/6K/4K modes.
While the Osmo 360 offers 128GB internal storage (105GB usable), relying solely on it for 8K shooting can quickly fill it up.
2. Installing the DJI Mimo App
- Download the DJI Mimo app (available on iOS/Android).
- Turn on the Osmo 360 and enable Bluetooth & Wi-Fi on your phone.
- Launch the Mimo app, tap “+ Add Device,” and follow the pairing instructions. This enables firmware updates, remote viewing, and advanced editing features.
Security Tip: Always update your firmware before heading out—it ensures your device functions optimally.
3. Mounting and Accessories
- Attach the magnetic quick-release mount to any tripod, helmet, chest rig, or selfie stick—the click means no missing screws!
- Consider using the Osmo Audio direct connection for vlogs or interviews.
- The camera’s ¼” thread fits with most third-party equipment, offering great flexibility.
4. First Power-On & Basic Settings
- Press the power button until the display activates.
- Complete the setup wizard: select language, set the time/date, and choose your exposure mode (auto/manual).
- Set your desired video/photo resolution: 8K for detail, 6K/4K for extended recording time or more manageable files.
5. Key Features to Explore Early
- HorizonSteady / RockSteady 3.0: Guarantees level footage, even while you’re on the move.
- D-Log M/10-bit Color: Offers a flat color profile for advanced grading, or you can use the standard profile for stunning visuals out-of-the-box.
- Pre-Rec (Pre-Recording): Buffer the last 5–300 seconds to ensure you never miss a pivotal moment.
- Intelligent Tracking: Use the DJI Mimo app to automatically track people, pets, or objects—a boon for solo operators.
How to Shoot: Best Practices for Beginners
Shooting Video
- Start with 8K/30fps for cinematic quality, or choose 8K/50fps for ultra-smooth motion ideal for action sports.
- The single-lens “Boost” mode offers a 170° field of vision at 4K/120fps, perfect for dramatic slow-motion or extreme sports.
- Switch to Night Mode for impressive low-light results in evening scenes.
Shooting Photos
- Select 360 Photo for stunning 120MP panoramas—your smartphone camera will pale in comparison.
- Use a tripod for maximum sharpness (minimum stitching distance ≈ 75cm); greater distance results in more seamless stitching.
Tips for Flawless 360° Content
- Avoid getting too close to the lens tip—the “stitching zone” where two images merge can reveal errors most prominently.
- Keep important details away from the camera’s edge to avoid distortion.
- Have a microfiber on hand to clean lenses—a single speck can ruin your shot.
Editing Your 360° Footage
On Desktop: DJI Studio
- Import files via USB-C for a fast transfer with the Osmo 360.
- Post-edit perspectives using “keyframes” to refocus, reframe, or follow action—ideal for YouTube’s “tiny planet” effects or VR tours.
- Color grade using 10-bit D-Log M, or stay in Standard for quick edits.
On Mobile: DJI Mimo
- Quickly reframe, crop, and export clips for TikTok, Instagram, or Reels.
- Apply smart filters and templates for professional-quality edits within seconds.
Connect Directly With Social Media
Share your creations straight from the DJI Mimo app to your favorite platforms—perfect for capturing those live moments.
Real-World Examples & Success Stories
Travel Vlogger: Anna from Moscow utilized the Osmo 360 for her Silk Road cycling journey. Despite dust, snow, and camel interference, she gained 5,000 followers after her first 360 upload thanks to clear, engaging footage.
Event Videographer: Svyatoslav, a wedding cameraman, now opts for Osmo 360 during outdoor ceremonies: “With one camera and a single tripod, I capture every essential moment, cutting editing time by half.”
VR Startups: Educational firms use it to film interactive VR lessons, offering students a unique in-class experience from home.
Common Mistakes & How to Avoid Them
- Skipping firmware updates: Every update enhances performance, stitching, and stabilization, so make it a priority.
- Ignoring battery and heat alerts: Filming in 8K is demanding; ensure occasional breaks to prevent overheating.
- Protecting the lenses: The 360 glass is costly—protect it by keeping covers on when not in use.
- Underestimating file sizes: 8K recording uses approximately 1GB per minute; plan ahead and carry extra storage.
DJI Osmo 360 vs. Insta360 X5
| Feature | DJI Osmo 360 | Insta360 X5 |
|---|---|---|
| Max Video Resolution | Native 8K/50fps, 6K/60fps, 4K/120fps | 8K/30fps, 6K/60fps, 4K/120fps |
| Photo Resolution | 120MP | 72MP |
| Sensor Size | Dual 1-inch HDR | 1/1.3-inch |
| Dynamic Range | 13.5 stops, D-Log M, 10-bit | 12 stops, 8-bit |
| Battery Life | 100 min (8K), 190 min (6K) | ≈ 75 min (8K) |
| Accessories | Magnetic system, DJI Mic native | Proprietary, less universal |
| Internal Storage | 128GB (105GB usable) | 32GB |
| Software | DJI Studio, Mimo | Insta360 Studio |
| Waterproof | Down to 10m | Down to 5m |
DJI’s offering excels in resolution, battery longevity, and editing flexibility.
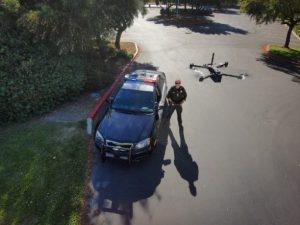
Safety, Regulations & Drone Integration
Can the Osmo 360 be used with drones? Absolutely! Compatible with most professional and hobby drones through DJI’s ecosystem, it opens exciting opportunities for aerial mapping, real estate tours, and cinematic fly-throughs.
Pro-Tip: Ensure compliance with local drone laws, particularly regarding weight limits and visual line-of-sight requirements. By 2025, many nations impose restrictions on drones with heavier payloads over urban areas.
Pro Hacks & Expert Advice
- Memory Management: On extended trips, carry multiple microSD cards and a portable SSD.
- Audio: Utilize dual mics for two-person vlogs, synced effortlessly.
- Extreme Environments: Sensors operate to -20°C, ideal for winter adventures and alpine treks.
- “Invisible Selfie Stick”: DJI’s algorithm removes the stick, giving magical effects akin to a flying carpet.
Brand Fact: DJI’s team includes former athletes and filmmakers, with beta testers often being YouTubers, athletes, or outdoor professionals, ensuring the Osmo 360 is tough enough for the wildest tales.
The Human Factor: Our Team, Our Approach
What drives us? More than a just store, we’re a group of adventurers and storytellers. From early prototype trials in the Altai Mountains to helping a grandmother capture VR memories, our goal is to humanize tech interactions.
We offer free workshops for Osmo 360 newbies, online and face-to-face. Our support staff are real product users and not mere salespeople.
So whether you’re prepping for Everest or launching a TikTok stream, we’re beside you on this journey.
Final Checklist: Before Your First Shoot
- Charge the Osmo 360 to full.
- Insert and format a fast and reliable microSD card.
- Download and sync the DJI Mimo app.
- Perform firmware updates.
- Securely attach to your chosen mount.
- Ensure lenses are spotless.
- Record a short test clip to check all settings.
Ready for Takeoff—Your Story Awaits
May your adventures be legendary, editing hassle-free, and footage perpetually in focus. From quick TikToks to full-length films, your Osmo 360 is more than a camera: it’s a storyteller’s companion. Go forth, capture everything.
Questions? Need setup help? Visit us, join our monthly Q&A, or message us on social media. We’re eager to assist, frame by frame.